Creating The Rosa Ring
- Isabel White
- Oct 31, 2025
- 2 min read

After my first attempt at a floral wax failed, I had to think on why. I knew I wanted a graphic, bright floral design. Inspired by tattoos, stained glass and Japanese wood block prints.
I drew this over and over again, afraid to start carving after the disappointment of the last wax (video of which is here).
The shank I kept streamlined, with an empire building style step to enable sizing the ring later on without warping.
All design decisions made, there was nothing to do but get started. Here's how it went...
The wax carving process
First off, I carve the design in wax. I then take the wax to AA Fine Castings in Highbury and Islington. I request a single casting in silver. This will be the master that a mould is made from. The reason I don't make a mould from the wax is, I like to tidy the ring up in silver. Besides, I needed to test the resin reservoirs on the top held properly before committing to a mould, and I could only do that in the metal version.


The video below shows the tidying up of the casting and testing of the resin and the long awaited (I am impatient) reveal of how the ring came out.
Preparing The Master
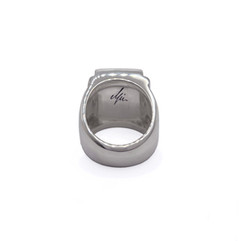
I photographed the master before taking it to the casters. This meant I could edit the product photos whilst waiting for my castings to be ready. It feels like a long road making a new product. The wax, the master, photo editing, advertising, pricing, description and finally taking new orders. I enjoy wearing all these different hats. A lot of effort goes into each piece and I hope it shows.
The Finished Rosa Ring
Now available to buy HERE


A big thank you to very one that preordered their Rosa Ring!
And Thanks for looking,
Isabel
X


Comments